Brotli is a compression algorithm developed by Google as an alternative to Gzip. Brotli is superior in performance, so you might want to have it running even if your server is already deployed with Nginx but without Brotli support.
If you’re a developer or just own a website, you don’t really have to implement or be bothered by this article, as your server should already have Brotli compression enabled. If it doesn’t, ask your hosting company or whoever manages your server about it.
If you want to install and configure Nginx Brotli on your own, you’re in luck. You’ll find everything you need right here in this tutorial for CentOS 8.
Brotli, at least when used at a compression level 6 or 7, in my findings uses less CPU and has shown compression ratios of ~14% smaller than Gzip or better. Brotli works best for text compression.
Before we dive into anything, please keep Gzip properly configured for your Nginx, as legacy browsers will likely not support Brotli and Gzip is still a thousand times better than nothing.
Why does compression in HTTP matter? And should I bother?
Compression is an easy way to reduce a general web page’s size. And that means speed. A smaller file takes less time to download, and generally speaking, you’re offering your users a better experience.
And as you’re already using Gzip, adding Brotli support means that you will reduce CPU usage and get even better compression. It’s amazing!
(compressing and decompressing stuff eats CPU but please don’t go the other way and disable compression as this will lead to worse performance for your user than without Gzip/Brotli)
In short, you should bother doing this or asking about this if your server doesn’t already have Brotli support. Because modern browsers have support so your users will benefit from this small upgrade.
How to check if my server uses Brotli?
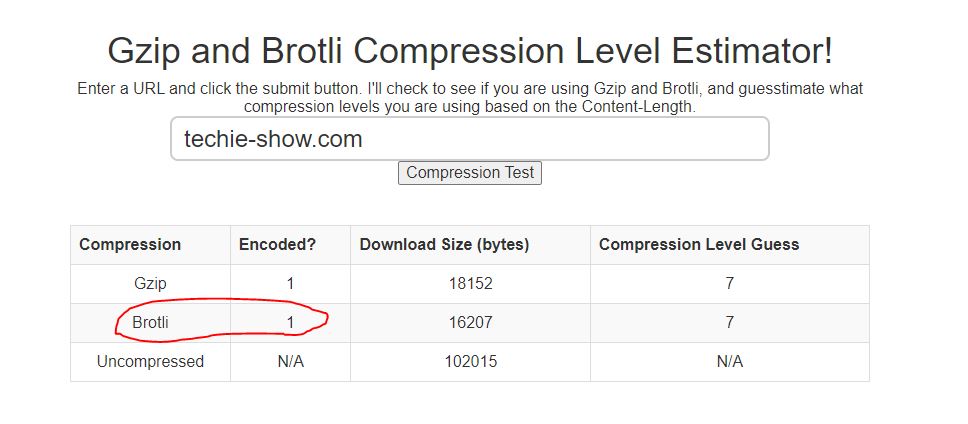
You can use this tool. In the screenshot below, you can see that next to Brotli we have a 1. That means that the domain is configured to support Brotli. And that its server supports Brotli, obviously. A 0 indicates it doesn’t support Brotli, and you can read on in order to install and configure it.
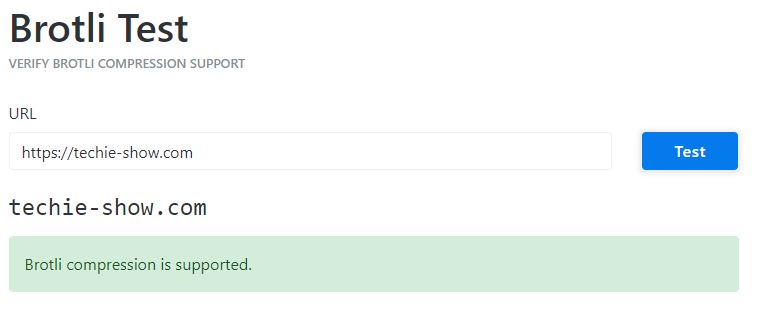
Or for a simple yes or no answer, just use KeyCDN’s website: https://tools.keycdn.com/brotli-test
This is how a good result looks over here:
How to install Nginx Brotli module
Alright, let’s get to work.
Since Brotli is not officially supported by Nginx, Google has the ngx_brotli repository that we’ll have to clone. So it’s not your run-of-the-mill 3-commands and done, but it’s not rocket science anyway. Let’s get to it.
Step 1
Let’s install what we need to get this done.
yum groupinstall 'Development Tools' -y

yum install gcc-c++ flex bison yajl yajl-devel curl-devel curl GeoIP-devel doxygen zlib-devel pcre-devel

yum install lmdb lmdb-devel libxml2 libxml2-devel ssdeep ssdeep-devel lua lua-devel
Step 2
Let’s clone ngx_brotli from Github. (https://github.com/google/ngx_brotli)
cd /usr/src

git clone https://github.com/google/ngx_brotli.git

cd ngx_brotli

git submodule update --init
Step 3
Check what Nginx version you are running. (note the uppercase V)
nginx -V

nginx version: nginx/1.20.1
built by gcc 8.4.1 20200928 (Red Hat 8.4.1-1) (GCC)
built with OpenSSL 1.1.1c FIPS  28 May 2019 (running with OpenSSL 1.1.1g FIPS  21 Apr 2020)
TLS SNI support enabled
configure arguments: --prefix=/etc/nginx --sbin-path=/usr/sbin/nginx --modules-path=/usr/lib64/nginx/modules --conf-path=/etc/nginx/nginx.conf --error-log-path=/var/log/nginx/error.log --http-log-path=/var/log/nginx/access.log --pid-path=/var/run/nginx.pid --lock-path=/var/run/nginx.lock --http-client-body-temp-path=/var/cache/nginx/client_temp --http-proxy-temp-path=/var/cache/nginx/proxy_temp --http-fastcgi-temp-path=/var/cache/nginx/fastcgi_temp --http-uwsgi-temp-path=/var/cache/nginx/uwsgi_temp --http-scgi-temp-path=/var/cache/nginx/scgi_temp --user=nginx --group=nginx --with-compat --with-file-aio --with-threads --with-http_addition_module --with-http_auth_request_module --with-http_dav_module --with-http_flv_module --with-http_gunzip_module --with-http_gzip_static_module --with-http_mp4_module --with-http_random_index_module --with-http_realip_module --with-http_secure_link_module --with-http_slice_module --with-http_ssl_module --with-http_stub_status_module --with-http_sub_module --with-http_v2_module --with-mail --with-mail_ssl_module --with-stream --with-stream_realip_module --with-stream_ssl_module --with-stream_ssl_preread_module --with-cc-opt='-O2 -g -pipe -Wall -Werror=format-security -Wp,-D_FORTIFY_SOURCE=2 -Wp,-D_GLIBCXX_ASSERTIONS -fexceptions -fstack-protector-strong -grecord-gcc-switches -specs=/usr/lib/rpm/redhat/redhat-hardened-cc1 -specs=/usr/lib/rpm/redhat/redhat-annobin-cc1 -m64 -mtune=generic -fasynchronous-unwind-tables -fstack-clash-protection -fcf-protection -fPIC' --with-ld-opt='-Wl,-z,relro -Wl,-z,now -pie'
So the machine I ran this command uses Nginx v1.20.1. Neat!
We’re going to download the Nginx source, depending on the above result. So I’m downloading v1.20.1. You download yours.
cd /usr/src

wget https://nginx.org/download/nginx-1.20.1.tar.gz  !!replace 1.20.1 with your version

tar zxvf nginx-1.20.1.tar.gz

cd nginx-1.20.nginx-1

./configure --with-compat --add-dynamic-module=../ngx_brotli

make modules
Bam! You’re done.
Now you can find two new files in the /nginx-1.20.1/obj/ folder (obviously replace with your version).
The two files are: ngx_http_brotli_static_module.so and ngx_http_brotli_filter_module.so.
You need to copy these to your Nginx modules folder, usually located at /etc/nginx/modules.
Step 4
Actually configuring Nginx to use the new module.
At the top (!) of your nginx.conf file load the modules:
load_module modules/ngx_http_brotli_filter_module.so;
load_module modules/ngx_http_brotli_static_module.so;
And in your server block, or directly in your HTTP block if you want to enable it for every domain served by your Nginx add:
brotli on;
brotli_static on;
brotli_comp_level 7;    # this setting can vary from 1-11
brotli_types text/xml image/svg+xml application/x-font-ttf image/vnd.microsoft.icon application/x-font-opentype application/json font/eot application/vnd.ms-fontobject application/javascript font/otf application/xml application/xhtml+xml text/javascript  application/x-javascript text/plain application/x-font-truetype application/xml+rss image/x-icon font/opentype text/css image/x-win-bitmap;
Change your compression level to what you need. I usually use 7.
Now, remember to test your configuration with:
nginx -t
And if the syntax is ok and the test is successful, you’re done!
Restart Nginx to enjoy the benefits.
Congratulations you have installed Brotli and configured it on Nginx. Your users will thank you for caring so much. Well not really, but you’ll know that you are doing the best you can to make the web faster.
Step 5
Checking to see if everything is ok, we can use the link I mentioned at the beginning of the article – https://tools.paulcalvano.com/compression.php
For the Techie-show.com homepage, we’re saving about 2 KB (for longer pages with a huge article, we save even more – a lot of text content, where Brotli shines). So on the homepage, we’re talking about an 11% size reduction.
That’s pretty good for a 10-minute job if you ask me.
What about brotli_static?
Enabling brotli_static simply causes Brotli to look for pre-compressed files and serve those directly without performing any compression – as they are already compressed. This saves some CPU power.
Arguably the usage and the need to pre-compress stuff varies from scenario to scenario. For example, if all my CSS files are served via a CDN, it can be quite pointless depending on how often files change.
We’ll talk about pre-compressing static assets with Brotli in another article. You’ll probably want to play in your home lab with this first if it’s something new.
Conclusion
So there you have it! A fast method of adding Brotli to your Nginx. Small (well, arguably… I find them important) stuff like this task of enabling Bortli to make your server run better and more efficiently add up. And in the end, you get a well-performing app, store, or website.
Did you see my article on Premium DNS? Give it a read over here: https://techie-show.com/is-premium-dns-worth-it-for-your-blog/
I believe we should always push the limit and try to be as efficient as possible. And taking advantage of newer software and technologies allows us to be more efficient.
If you want to support this blog consider joining me on Patreon!
Become a Patron!


